
Edit questions
Topics on this page
- Add, move, delete new question / new element
- Questions / Add elements
- Settings
- Option of the question element
Below we explain how to edit questions. For reasons of simplification, we use the frequently selected element "Multiple Choice" in this example. However, the explanations can in principle also be applied to all other elements.
Add, move, delete new question / new element

When you hover or click over a question/item, a sidebar (#-1) appears on the right via which you can:
- add another question element by clicking on the "+" buttons before or after the existing question
- use the "up/down arrow" to move the selected element
- delete the question element by means of the "trash" button
At the end of the questionnaire you can also add a new element using the "Add new element" button (#-2).
Questions / Add elements

By clicking on the "+" buttons (#-1) in the right sidebar or also on the "Add new element" button (#-2) at the end of the questionnaire, you will get a selection dialog with the elements you can add.
The following elements are available for you to create your survey:
- Description
- Input field (for open questions) with options for validation of free text input.
- Single line text field
- Multiline text field
- Number
- Date
- Time
- E-mail address
- Form with options for validation of the form fields
- Single line text field
- Multiline text field
- Number
- Date
- Time
- E-Mail address
- Selection of predefined answers from drop-down list
- Multiple Choice
- Single selection (radio button)
- Multiple selection (checkbox)
- Dropdown-Liste
- Matrix (Likert or Bipolar)
- Single selection (radio button)
- Multiple selection (checkbox)
- Single line text field
- Drop-down list
- Group matrix (Likert) with the possibility of configuration at the group level
- Single selection (radio button)
- Multiple selection (checkbox)
- Single line text field
- Drop-down list
- Slider or stars
- Ranking/ Hierarchy
- Drag & Drop
- Number
- Dropdown-list
- Sum/ Constant sum with the possibility to limit the final sum
- File upload
- Change pages
General notes:
- In the elements (except description and sum/constant sum) additional free text fields can be added at the level of the answer options.
- Note texts or input helpers can be inserted for an entire element at the top, bottom, left and/or right.
- In the elements with free text fields (except in a matrix or group matrix) additional texts can be added in each case before or after the input field.
- In addition, it is possible to define your own validations for plausibility checks.
- Display logics (filters) can be defined for an entire element as well as for one or more response (options).
Settings

By clicking on the respective question element, you will get its setting options on the left side in the "Settings" area:
#-1 Under question type you can change the selected question type afterwards
#-2 Depending on the question element, you can set specific settings (e.g. single selection, multiple selection, single line/multiple line text field, dropdown list, etc.)
#-3 Clicking the box in front of "Force Answer" will make the selected question a required question
#-4 If you want to increase or decrease the number of answer options you can do so via + and - respectively by overwriting the number in the middle. If you would like to insert pre-written answer options into your questionnaire, you can do so under Options > Quick Entry
#-5 Depending on the question element, you can also specify the alignment of the answer options
#-6 Using the "Content" area, you can either add additional labels, such as hint texts or completion aids, to your question at the top, bottom, left and/ or right
.
Option of the question element
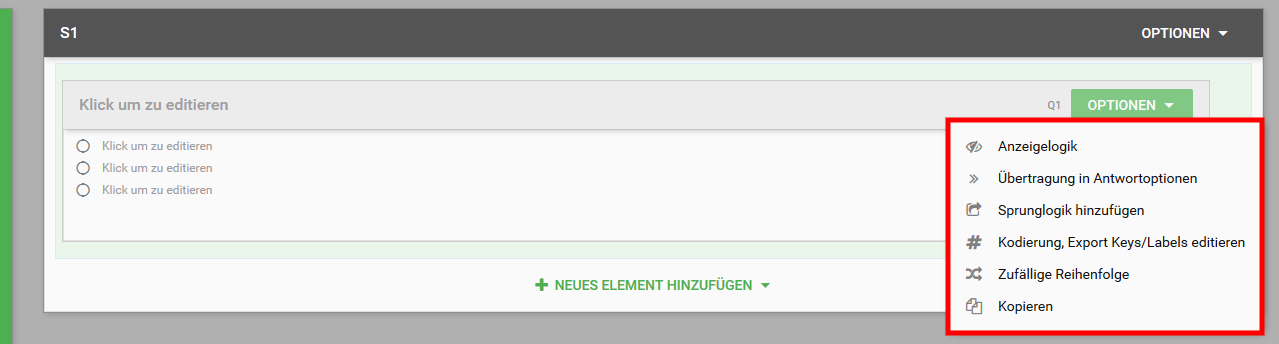
Also for our question elements there are different options:
- by means of the button "Display logic" you can, for example, the element conditionally fade in. Please note that it is mandatory to insert a page break before or after the linked element, so that the created condition can be executed
- "Transfer to response options" allows to transfer response options from already captured elements to the selected element
- "Add jump logic" provides the ability to define a fixed jump to another element
- if you want to make individual adjustments for your evaluation, please click on "Edit coding, export keys/labels"
- the "Random Order" button randomizes the display of the response options
- should you want to duplicate the element, you can use the "copy" element
Do you find this article helpful?


